Last updated on January 24th, 2024
If you want to know how to make flower pens, here’s a super easy tutorial that’ll have you making gorgeous bouquets!
Needless to say, flower pens are a great DIY project to make with your child while showing your appreciation for their teachers!
How To Make Flower Pens: An Easy DIY project
Teacher appreciation gifts are something that every parent of school age children will think about throughout their childrens’ school career.
I have a huge respect for school teachers, as their jobs have a direct impact on my child’s education.
Therefore, when I give teacher appreciation gifts, I want them to be special, from the heart, and also practical.
Back when my son was finishing up his year in Kindergarten, I searched high and low for a really cute gift idea for his teacher.
I wanted it to show that we took some time into it, but for it to also be a gift that wouldn’t be thrown into the pile of other ‘don’t-know-what-I’m-going-to-do-with-this’ handmade teacher gifts.
Hence, we (or I) decided on finding out how to make flower pens that are super cute and easy to do!

Flower Pens: Super Easy To Make
These are so easy to make, it’s actually kind of embarrassing.
Materials Needed
- A roll of green floral tape
- A package of approximately 10 cap-top pens (you don’t want to use the button-push pens because the floral tape will cover the button)
- Artificial flowers (approximately 10)
- A cute container
- Flat glass marbles (you might need 2 to 3 small bags of these – I used different colors)
- Wire cutters (I had my own from my past life as a handmade jewelry designer, but I’m sure your husband has a pair in his toolbox)
I got the floral tape, the artificial flowers, the cute polka dot pot, and the flat glass marbles all from the Christmas Tree Shops in Hagerstown, MD.
Love that place!
I bought the pens from Weis grocery store.
How To Make Flower Pens Not Sticky
The key to making flower pens not sticky is to use floral tape.
Floral tape sticks to itself, but if you wrap it around the stem of the flower and the pen correctly, it won’t be sticky.
How Do You Make A Flower Pen
Now here’s how you make them:
- With the wire cutters:
- Cut the stem of each flower so that the top of the flower is flush to the bottom of the pen.
- Also, the end of the stem should be the length of the pen up to the cap.
- Once you have cut all of the artificial flowers:
- Unroll the floral tape and wrap it generously around the stem and the pen.
- Start from the bottom of the stem to the very top of the stem.
- The floral tape sticks to itself, so it will stay in place once you’ve wrapped all the way to the top.
- Once you have completed all of the pen flowers:
- Pour your flat marbles inside your container.
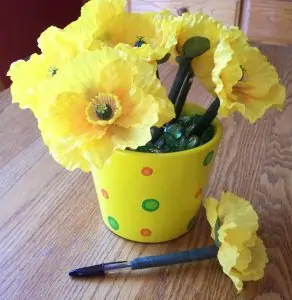
- Then stick the flower pens inside to form an arrangement.

And there ya have it.
Clearly, there’s not much to it, but oh so cute!
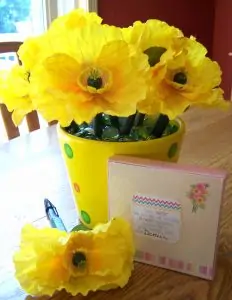
My son’s teacher’s favorite color is yellow, which is why we chose the cute yellow planter and the pretty yellow flowers.
Also, we included a little yellow notepad to go with the pens.
It’s a decoration and a useful item all at the same time!
What’s your favorite teacher appreciation gift to give and/or receive?
For more DIY ideas, go to our posts on:

- 2024 Holiday Gift Guide: Shop Local in Frederick, MD! - November 1, 2024
- Luna Aesthetics: Botox, Filler, & Weight Loss Services - October 8, 2024
- Haunted Houses Near Frederick, MD - September 10, 2024

2 thoughts on “How To Make Flower Pens: Practical Teacher Appreciation Gifts”
Comments are closed.