Last updated on January 22nd, 2024
This super easy DIY front door mat is the perfect way to get your feet wet in the DIY waters!
A grapefruit slice door mat for summer?
Just too cute!
And it looks like you bought this welcome mat from Anthropologie but is WAY cheaper AND more fun!
And as a bonus, you’ll have the bragging rights saying you made your very own DIY doormat.
DIY Front Door Mat
When backyard parties, cold drinks, and colorful decor all start to come together, you know what time it is — SUMMERTIME!
One of the things I love most about summer is the warm weather, giving us plenty of excuses to throw outdoor get-togethers and spend time with our favorite people.
And if you’re a true hostess with the mostess, you know no summer party is complete without the right decor.
Clearly, Will Smith’s ‘Summertime’ must be blasting on repeat!
What a fun way to greet your guests with a stunner doormat that’s sure to catch their eye and give off a fun summer vibe?!

The Best Outdoor DIY Front Door Mat
As you probably already know, the doormat trend has been EVERYWHERE lately.
I must say that I’m a fan.
Doormats give instant personality to your home and set the tone for what’s inside before you even cross the threshold.
And what better way to show your personality than to make the best DIY Front Door Mat with your own two hands?
Add a fresh squeeze of color to your space with this quick and easy project for a grapefruit slice doormat that’s almost too pretty to step on!
There are only 4 steps to this DIY Front Door Mat tutorial.
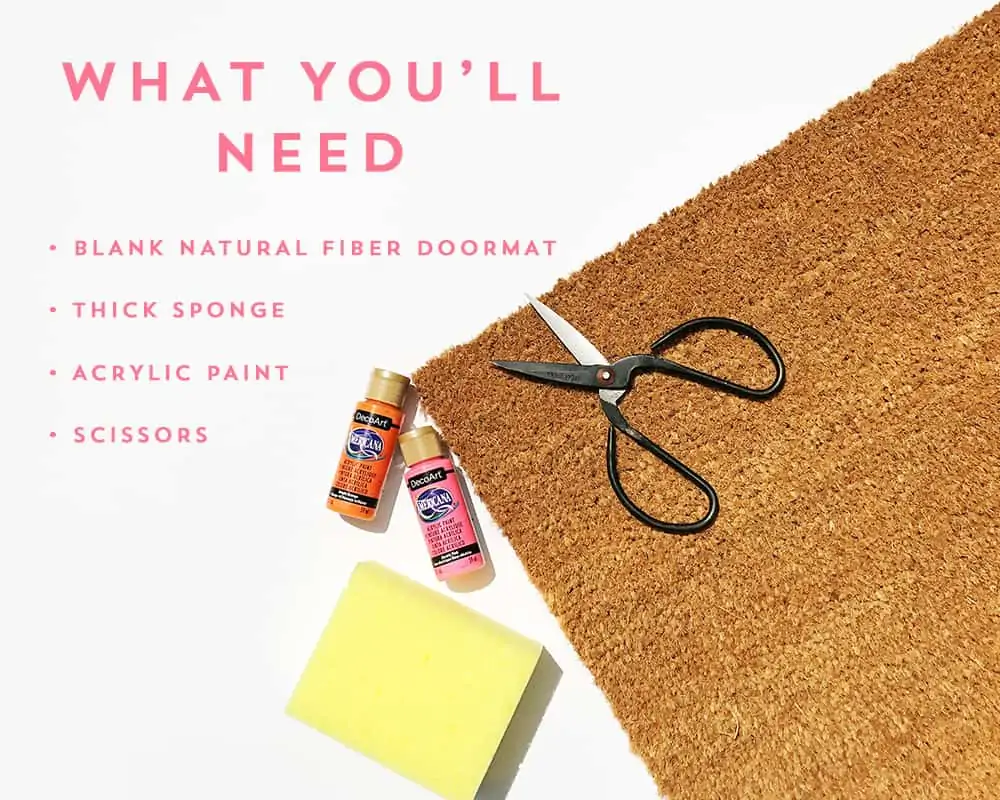
DIY Doormat Materials:
- A plain doormat – coir mat / natural fibers (You can get one from Amazon)
- A thick sponge
- Outdoor Acrylic paint (I used pink + orange for grapefruit, feel free to substitute colors to achieve a different kind of fruit)
- Scissors (no need for a Cricut machine or cutting machine)
You can get these items at most stores including Walmart, Home Depot, Michaels, Hobby Lobby, or any local craft store.
Step 1: Cut Your Sponge
First thing, shake out your doormat outside to eliminate any dust and loose fibers.
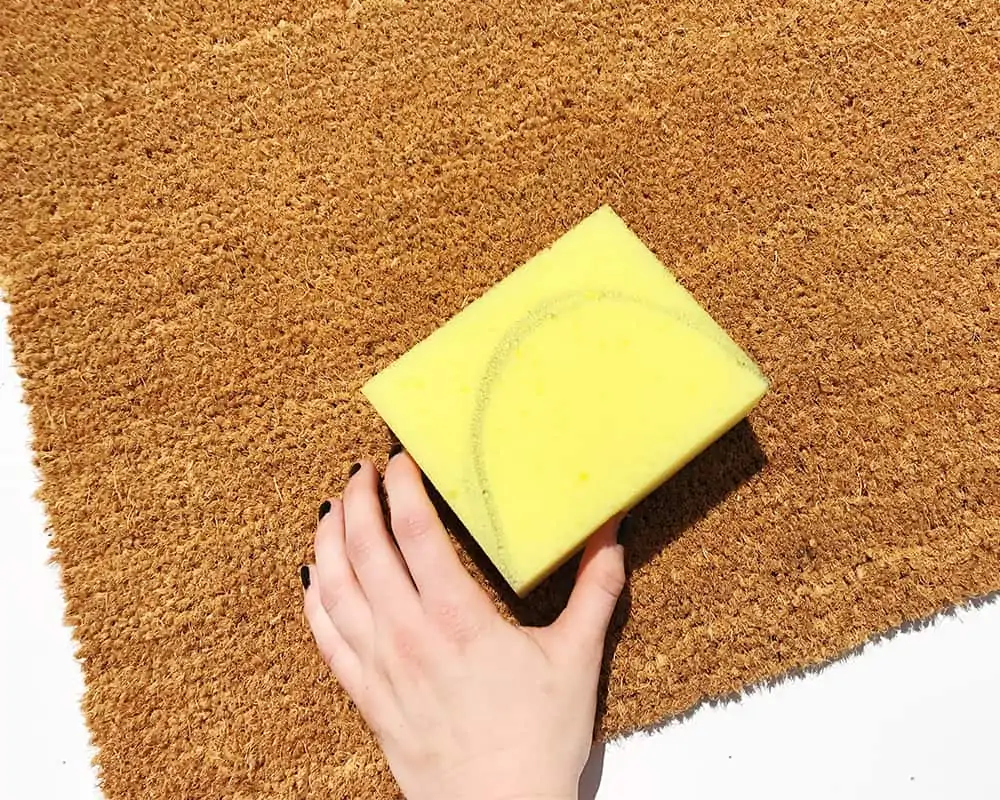
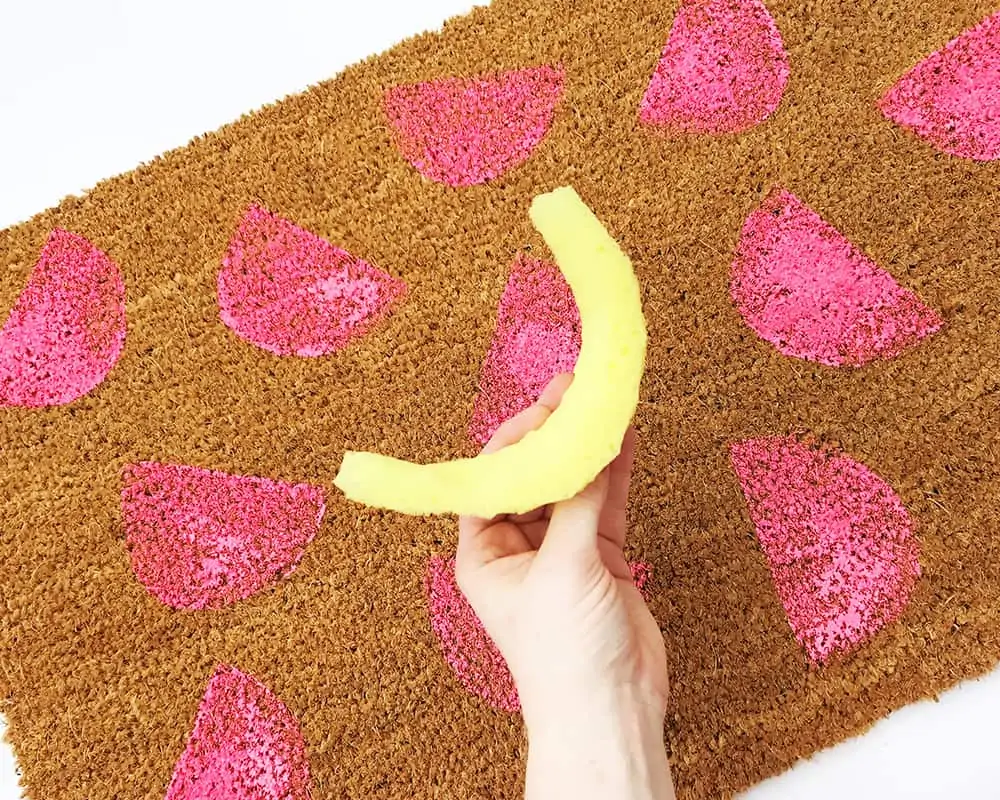
Then, take your sponge and draw a semi-circle shape against one of the long ends.
After that, put the remaining part of the cut sponge to the side.
Don’t throw that away just yet.
Step 2: Press Pink Slices Onto Your Mat
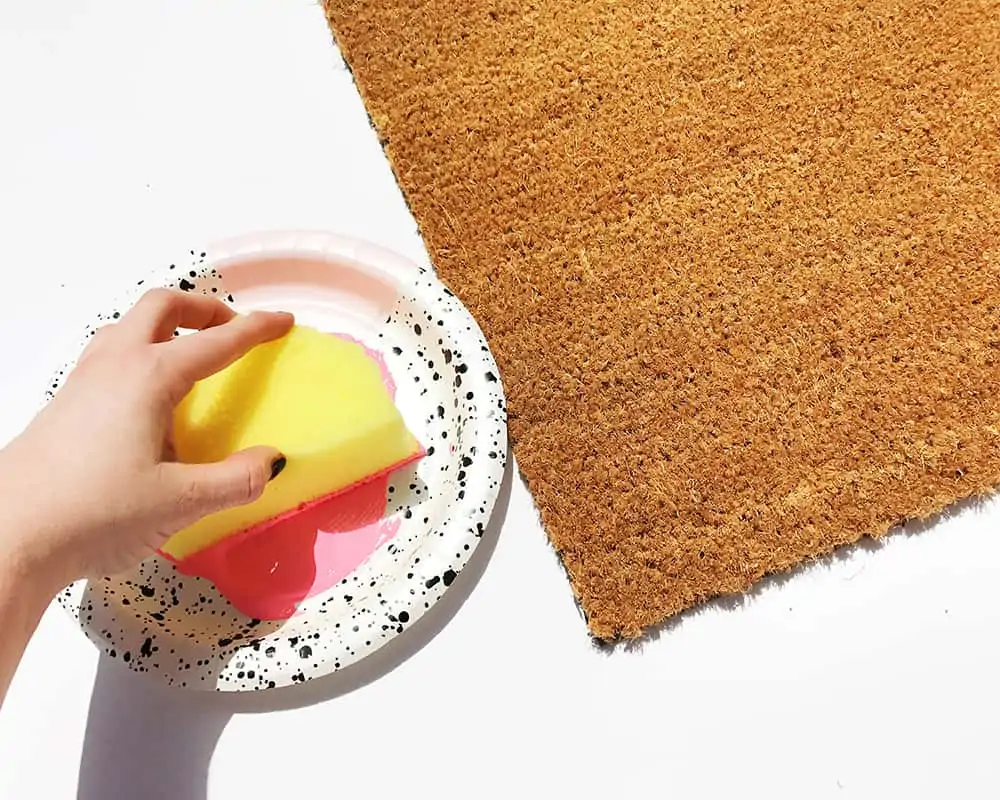
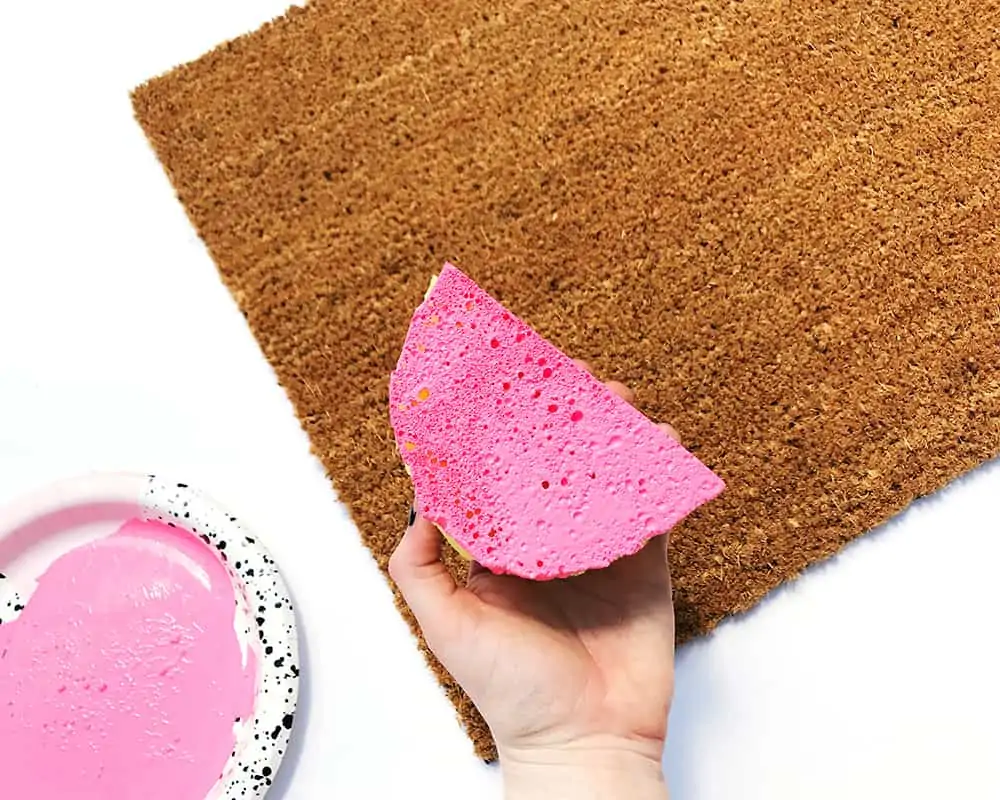
The next step is to pour some pink outdoor paint onto a paper plate and dip the semi-circle shaped sponge into it, heavily covering the bottom.
Firmly press the sponge stamp onto your mat and gently lift up.
Continue to cover your mat with this shape, alternating angles and dipping your sponge back into the paint after every application.
Given the rough surface texture of the mat, you may not cover the intended area completely.
This is fine, you can touch up these areas at the end for more crisp lines.
Once your mat is covered with the pink slices, let it dry for 30 minutes.
To speed up the process, you can use a blow dryer to dry the paint more quickly.
Step 3: Press Orange Thin Slices Onto Mat
Grab the leftover sponge piece and trim off the corners.
Then round them out until you achieve a crescent moon shape.
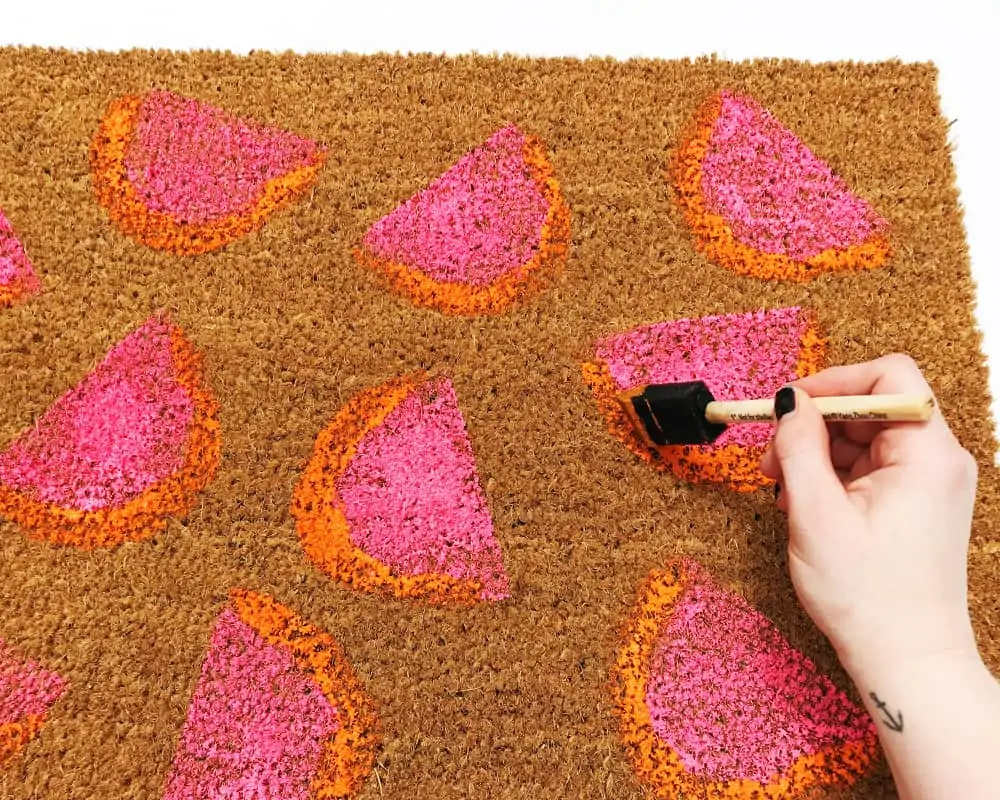
Pour the orange paint onto a paper plate and use the same stamping technique to apply the peels to the slices.
Finally, for the best results, let your custom doormat dry for 30 minutes.
Step 4: Touch Up Your Mat & Allow To Dry Completely
If needed, take a smaller sponge brush or stencil brush and touch up any areas you may have missed, firmly pressing down in a slow blotting motion.
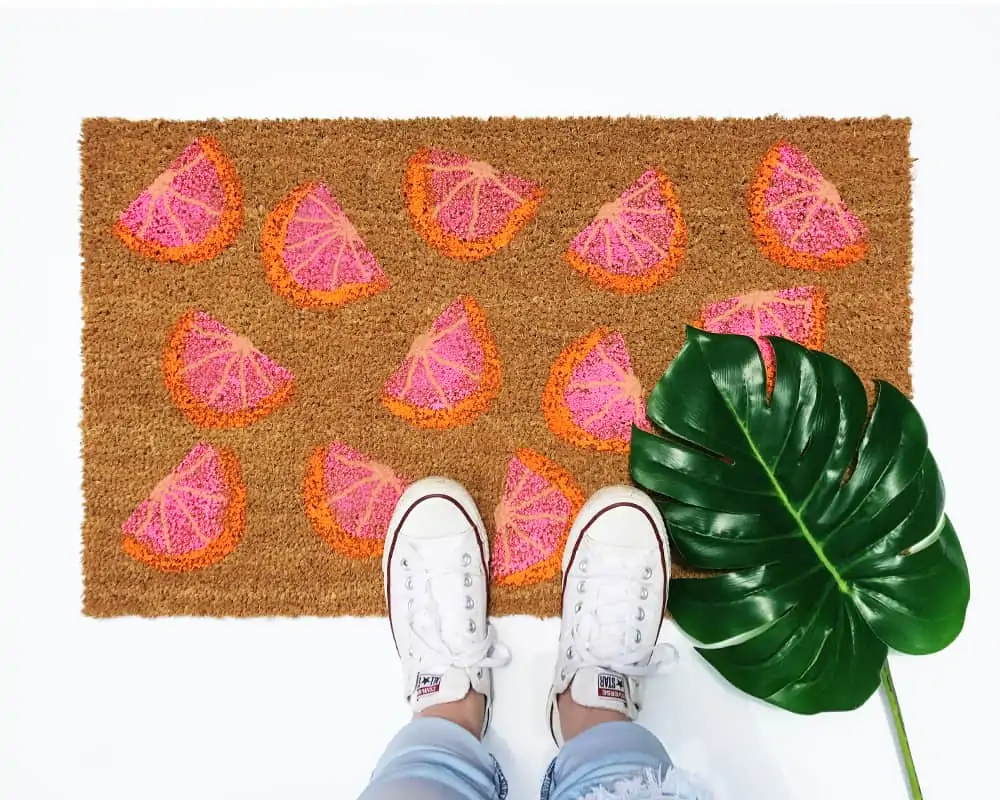
In addition, a fun option is to add in slice marks with a lighter color paint if you prefer a more detailed look.
Allow your painted doormat to dry for 24 hours.
For extra protection, apply a coat of clear spray waterproof sealant.
Now you’re ready to kickoff summer with a fruity treat for your feet!
Look how absolutely adorable your front porch will look with this doormat!
Go on and take those Instagram-worthy shoe photos standing on your new DIY front door mat!
You know you want to! 😉
For more fun DIY Home Decor Projects, click on over to:

- Resorts Near Frederick for a Weekend Getaway - April 10, 2025
- 2024 Holiday Gift Guide: Shop Local in Frederick, MD! - November 1, 2024
- Luna Aesthetics: Botox, Filler, & Weight Loss Services - October 8, 2024

I love it!!! How long did it take??
Our contributor Lindsey made the doormat. Not sure how long it took but I’m assuming once she got the supplies and set everything up, it probably only took about 30 minutes to make. Isn’t it adorable?